Defining a Site in Dreamweaver / Connecting to the Web server
- Open Dreamweaver and under the Site menu select Manage Sites.
- Select New to create a new site
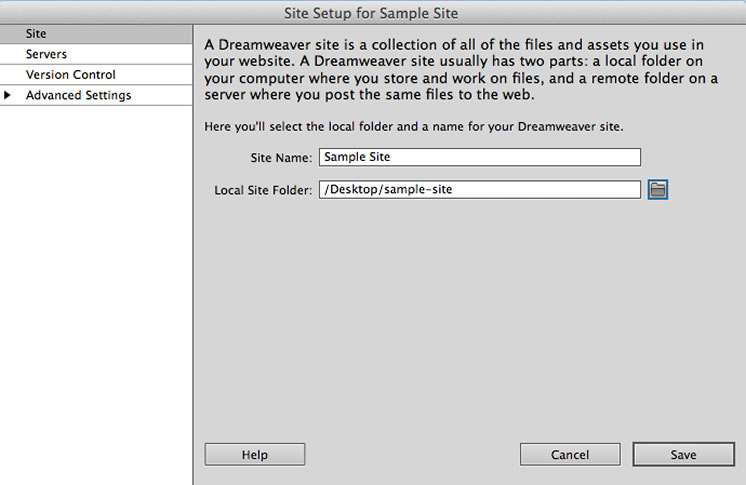
Site Settings
- Make sure you have Site selected from the menu on the left.
- Fill in the Site Name Field with the name of the site as you’d like it to appear in the Dreamweaver Files Panel
- To set the Local Site Folder use the Browse for Folder Button on the right end of the field. Select the (root) folder for the project that will contain all of the files for the project.
At this point you could begin using Dreamweaver to manage site assets but you will still be unable to publish those files to the web. In order to do so, you’ll need to configure the Servers section as well.
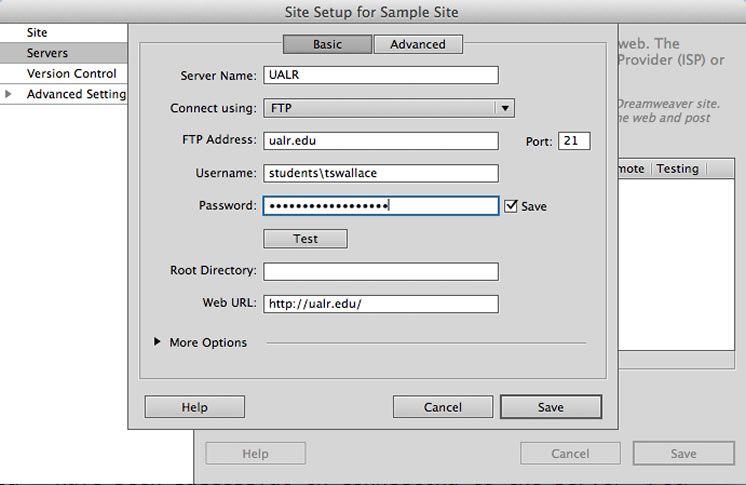
Server Settings
- Select Servers from the menu to the left
- Click the Add New Server Button (+) from the bottom left hand corner of the dialog box
- Enter the following information*
- Server Name: UALR
- Connect Using: FTP
- FTP Address: ualr.edu
- Username: students\username
- Password: Your Students Domain Password
- Root Directory: Leave Blank – If you’d like to use a sub-folder to host a given project create a new folder on the web server and then set the Root Directory to that folder name.
- Click the test button – you should receive a message that tells Dreamweaver has been successful in connecting to the server.
- When Successful, click Save and then Save


